THIS IS HOW I PERSONALLY SET UP MY OWN AVO CT160 WHEN TESTING A 6SN7 TUBE.
This tester is a top model, and one of the finest and most reliable ever made. It can do very much, and it is important to go through the handbook step by step. Learn how to use all features, and pay attention to what all settings do. Once you know how to use this tester, you will start to like it very much, and start to realize it's wonderful and reliable way of functioning. Interesting is also that the meter accuracy is unrelevant, accuracy comes from reading the values at the knobs. The meter is only used as "zero" indicator for most readings, because this tester is a bridge type of tester.
FOR LEGAL REASONS I SAY HERE: DON'T REPEAT THIS. ONLY USE THE OFFICIAL HANDBOOK. THIS IS ONLY HOW I PERSONALLY USE IT.
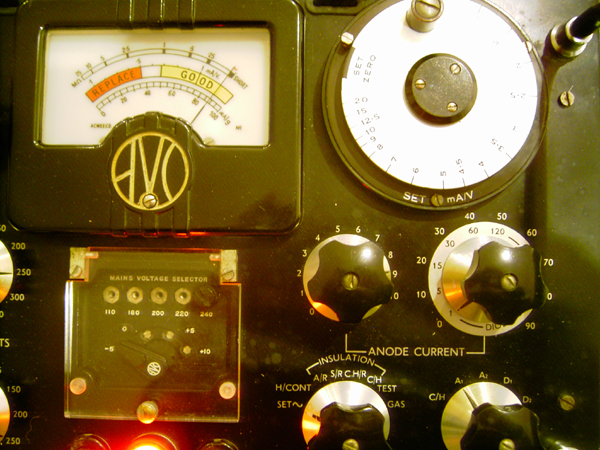
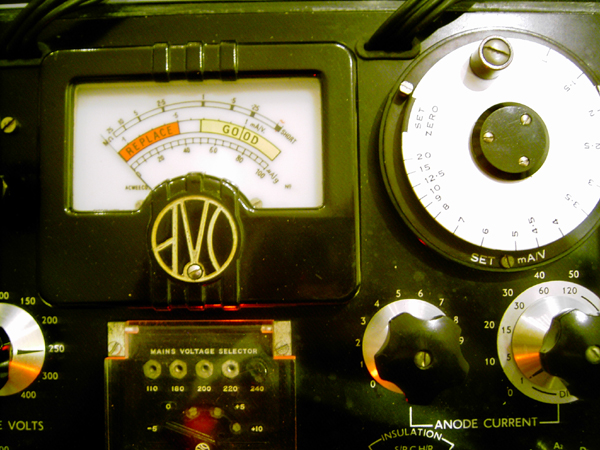
1) Set the mains voltage with the switches under the plastic cap. The right setting is when the needle is closest to the "~" sign. Always check this before every measurement.
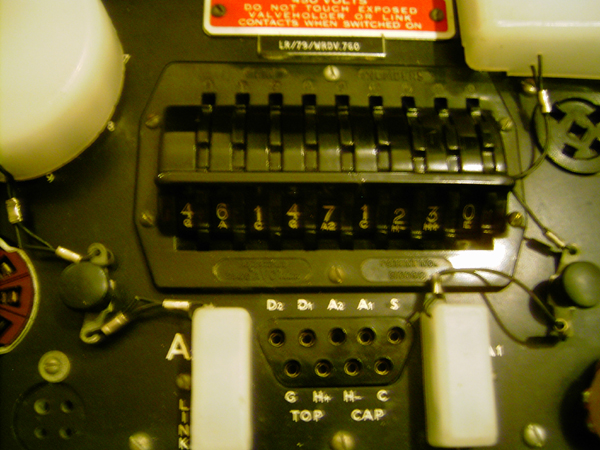
These are the socket connections for 6SN7
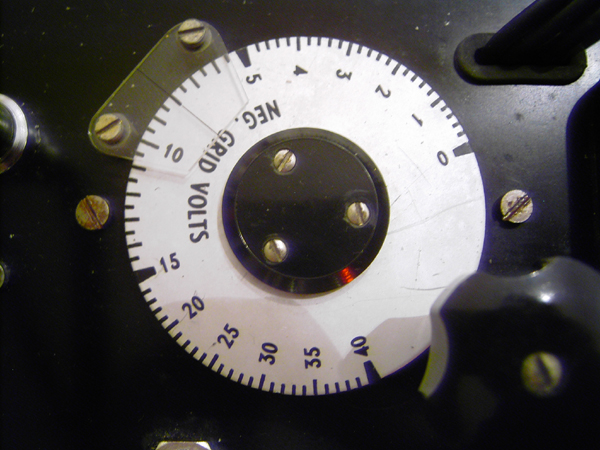
2) Set The grid to -8Volts.
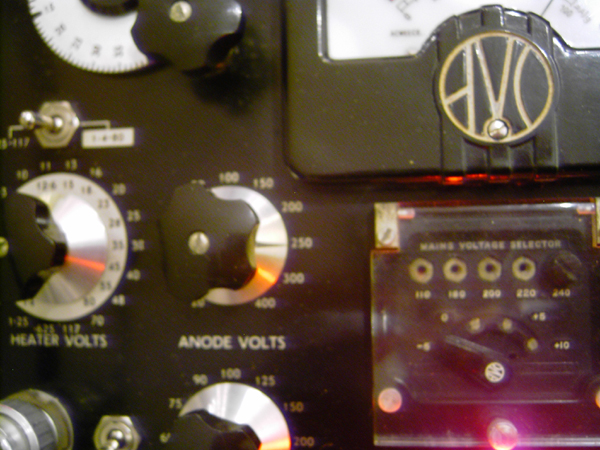
Set Anode to 250Volts
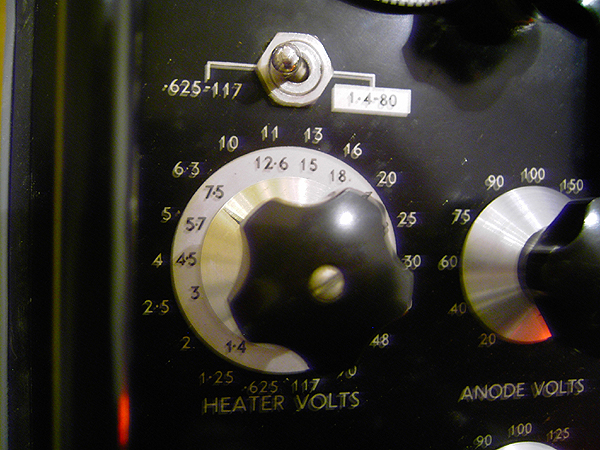
Set heater selector to 6.3V and the top switch to the left to get the outside scale
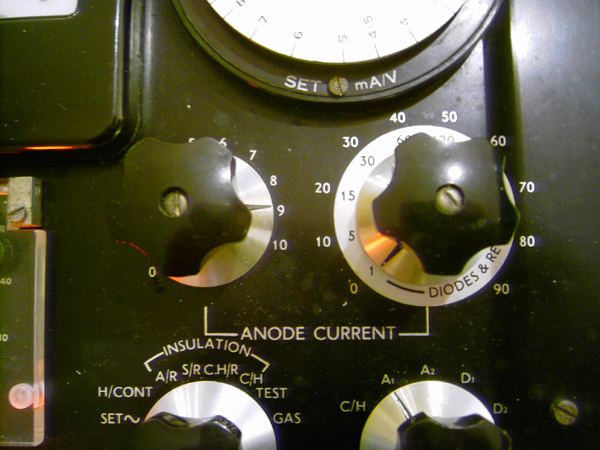
Set expected Anode current to 9mA. That is left switch at 9, and right switch at 0
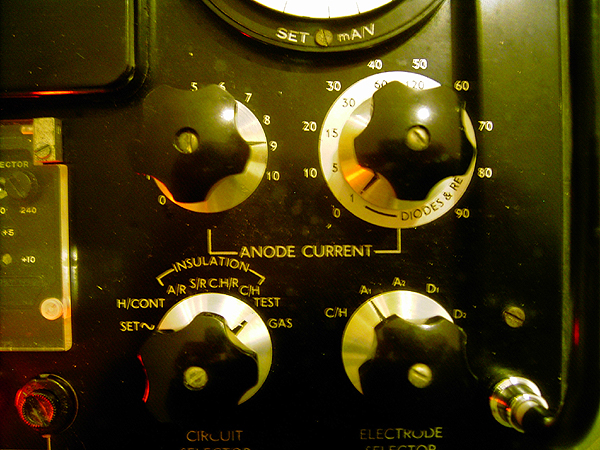
Set the Electrode selector to A1
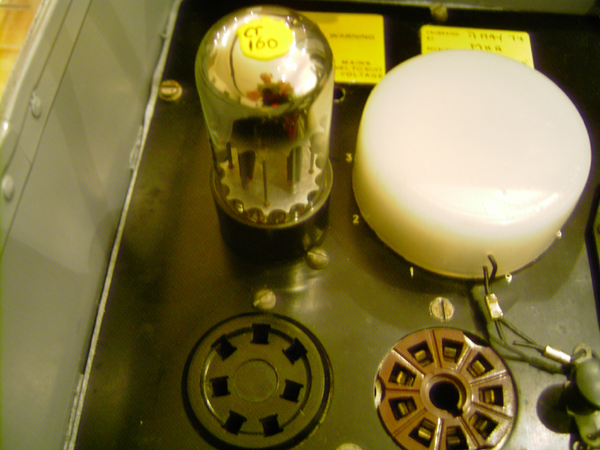
Put in the tube. Important: THIS is the octal socket. On the right side is another similar, but this is no octal.
You do not see this here, but you need the rotate the circuit selector switch from the left to the right, trough all positions.
~Set is already done
H/ Cont gives full scale when the heater is OK
C/H is cathode-heater leakage. Must give very low reading. For calibration tubes I use some that I select for some (very) small reading. So you see this test is working.
NOW COMES THE TEST. Put it on TEST!
If the meter starts to BUZZ wildly the anode current setting is much different from what the tube is actually doing.
You need to work on the outside scale for amplifier tubes, the inside scale is for rectifiers. Keep those scales apartl!
Balance the left Anode Current knob for ZERO reading. Your Anode current scale is 0 .... 9,9mA on the left knob. If you can't do that you need to set the right button on 10, and repeat. Your scale is now 10.....19,9 on the left knob. This needs some practice, but you will find it very logical once you know how its done.
SO NOW YOU HAVE MEASURED THE ANODE CURRENT FROM ONE HALF OF THE TUBE. (The part called A1, A stands for Anode)
DON'T CHANGE ANY SETTING NOW.
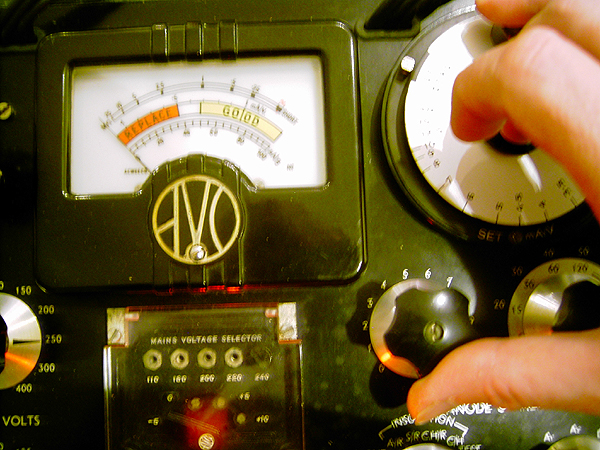
Now comes The nice part of this tester. Set The big wheel in The middle part of The black marking. This is a switch only, so in The middle is OK Now.... this will cause a small offset if The needle. Now balance The meter again with The left Anode current knob. Do this precisely, and when you see The needle is stabile, quickly do The next measurement.
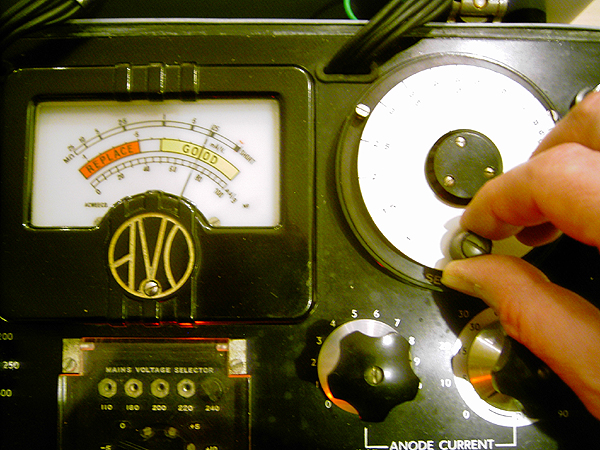
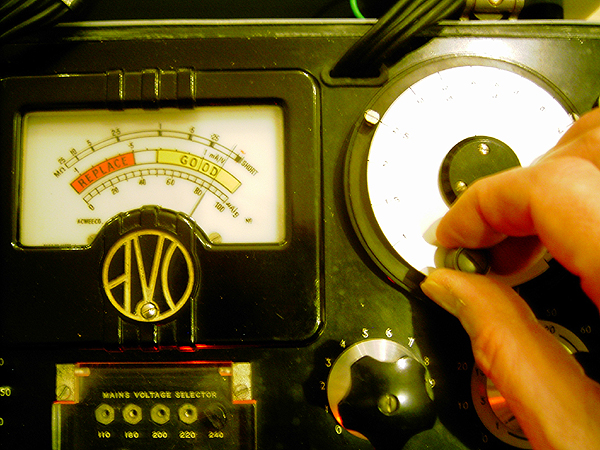
One balanced you turn The wheel as in The next picture until The meter is in The middle of "good". There is a marking stripe there. Adjust The needle on this stripe. Now read The Gm value from The wheel, and you're done. So now you have Ia and Gm at at Ua = 250V and Ug=-8V.
Of course you repeat that at any other setting of Ua and Ug. Don't do that now, first go to The next test.
Set The wheel on 2.5mA/V which is The "good" value for a new tube. Now you can read on The "REPLACE...GOOD" scale how good The tube is. Any value in The "good" means it is good. In The red means "BAD". Is is in between, it means The tube will probably work, but not very long any more. So no need to be in The middle of The "good" scale. The length of The scale is correct for any good tube.
NOW REPEAT FOR THE SECOND HALF OF THE TUBE
IF THE METER SCALE LIGHTS UP RED, THE SAFETY RELAY IS ACTIVATED. SWITCH OFF AND ON AGAIN. AFTER VERY HEAVY SHORT CIRCUITS, OR AFTER POST SHIPMENT YOU MAY NEED TO RESET THE RELAY BY HAND. JUST OPEN THE CONTACT VERY GENTLY WITH THE POWER OFF. YOU DO NEED TO OPEN THE TESTER FOR THIS.
WHY IS THE WHEEL GOING BACK TO ZERO, AUTOMATICALLY?
When you turn The wheel, you boost a lot if current through The tube, it is tested at REAL conditions, so it can get really hot from it. So when you're done, you let go The wheel an this greatly reduces The current through The tube. This saves tubes and equipment.